Trail Guide
How to Choose a Hiking Backpack: Fit, Volume & Features Explained
11 min read
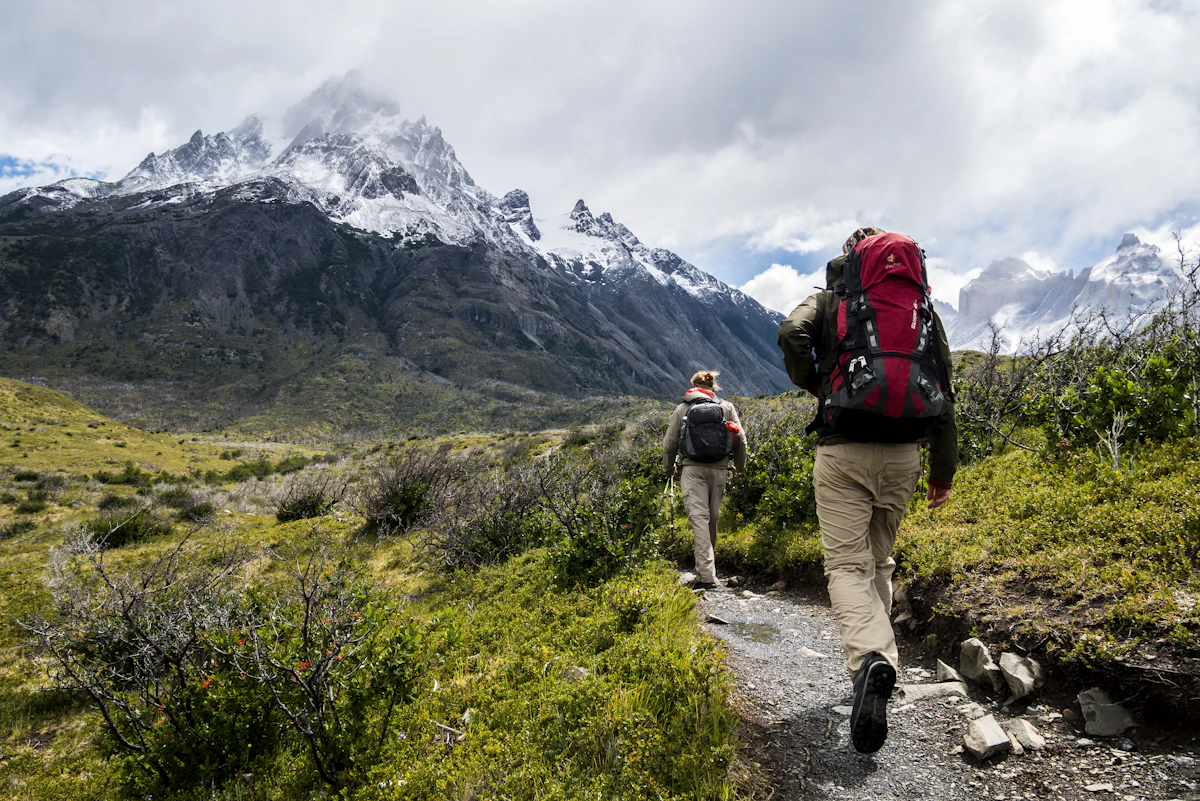
Choosing a hiking backpack comes down to three questions: how much volume do you actually need, does it fit your torso correctly, and which features will you use often enough to justify their weight. Walk into any outdoor store and you'll find dozens of packs claiming to solve every problem at once — internal vs. external frames, ventilated back panels, modular pockets, integrated rain covers. Most of that noise falls away once you get clear on your trip length and your body's measurements. This guide walks through frame types, fit systems, weatherproofing, and weight distribution so you can shop with confidence instead of guessing based on marketing copy. By the end, you'll know exactly what to measure, what to ignore, and how to load a pack so it actually feels like it disappears on your back.
Internal Frame vs. External Frame vs. Frameless
Almost every modern hiking backpack uses an internal frame — a set of aluminum stays or a molded plastic sheet built into the back panel that transfers load to the hips while keeping the pack's profile narrow and body-hugging. Internal frame packs are the right default for the vast majority of hikers, from day-trippers to thru-hikers, because they balance load support with mobility on technical terrain.
External frame packs, with their visible metal frame outside the fabric body, are largely a relic of 1970s backpacking. They excel at one thing: carrying very heavy, irregularly shaped loads (think multi-week expedition gear) with excellent ventilation between your back and the pack. But their rigid shape makes them clumsy on narrow trails, scrambles, or anywhere you need to duck, twist, or squeeze through brush.
Frameless packs strip out the frame entirely, relying on tight packing and a rolled foam pad or your own sleeping pad inserted into a sleeve for structure. They're the choice of ultralight backpackers carrying under roughly 20 pounds total, where every gram of frame material is overhead. If you're carrying more than that regularly, a frameless pack will feel unsupported and start to dig into your back.
Quick Tip
Load a pack with roughly the weight you'd actually carry before judging comfort in a store — an empty pack always feels fine.
The Fit System: Hipbelt, Shoulder Straps, and Load Lifters
A correctly fitted pack transfers roughly 70-80% of its weight to your hips, not your shoulders. The hipbelt should sit directly over your iliac crest (the bony ridge at the top of your hips), padded sections wrapping forward and clipping snugly without pinching. If the belt rides up over your belly or sags below your hips, the size is wrong regardless of how the shoulder straps feel.
Shoulder straps exist primarily to keep the pack stable and upright against your back, not to bear major weight. They should contour over your shoulders without gapping and without digging into the side of your neck. A sternum strap, clipped across your chest, prevents the shoulder straps from sliding outward on uneven terrain.
Load lifter straps — the short straps running from the top of the shoulder straps to the top of the pack frame — are the most commonly ignored adjustment point. Tightened correctly, they angle at roughly 45 degrees and pull the upper pack closer to your body, reducing the sensation of the pack pulling backward on climbs. Loosen them slightly on flat terrain and tighten them on steep ascents.
Rain Covers and Waterproofing: When DWR Is Enough
Most backpacks ship with a Durable Water Repellent (DWR) coating on the outer fabric, which beads water and sheds light drizzle for the first season or two of use. DWR is sufficient if you mostly hike in dry climates or carry a pack liner (a simple trash compactor bag works) inside the main compartment to protect your sleep system regardless of what the outside fabric does.
A dedicated rain cover — a separate waterproof shell that stretches over the entire pack — becomes worth the extra weight and pack space if you're hiking in regions with sustained rain, hiking multi-day trips where DWR has worn thin, or carrying gear that can't tolerate getting damp, like a down sleeping bag without a dry sack.
The most failure-prone spot on any pack in wet weather isn't the main fabric — it's the zippers and seams. Even with a rain cover, water can wick in through zipper teeth during a sustained downpour, which is why serious backpackers still pack critical items (sleeping bag, dry clothes) in an internal dry bag or liner as a second layer of defense.
Weight Distribution: Packing Strategy That Actually Works
Where you place gear inside the pack changes how the load feels far more than most hikers expect. Heavy items — your food bag, water reservoir, cooking gear — belong centered against your back and vertically positioned between your shoulder blades and hips. This keeps the pack's center of gravity close to your spine, reducing the leverage that pulls you backward or sideways.
Lighter, bulkier items like your sleeping bag and extra clothing layers go at the bottom of the pack, since you won't need them until camp and they don't need to be load-bearing. Items you'll want quick access to during the day — rain shell, snacks, map, first-aid kit — belong in top lids, hip belt pockets, and side mesh pockets where you can reach them without taking the pack off.
Side pockets are also the right place for a water bottle if you're not using a hydration bladder, and for trekking poles when you stow them temporarily. Avoid the common mistake of loading one side heavier than the other — an unbalanced pack causes you to unconsciously compensate with your posture, which adds up to real fatigue over a full day of hiking.
Trying Before You Buy
No amount of reading a spec sheet substitutes for actually putting weight in a pack and walking around a store aisle for a few minutes. Most outdoor retailers keep sandbags or weighted inserts at the backpack display specifically for this reason — ask, and load the pack to something close to your real trip weight before judging fit, since an unloaded pack tells you almost nothing about how it will feel ten miles into an actual hike.
Pay attention to where pressure builds as you walk: if you feel hot spots on your collarbones after a few minutes, the torso length is likely too short; if the hip belt rotates or slides down as you move, the pack is probably too long for your torso or the belt is sized wrong for your hips independent of the main pack size. Many manufacturers sell the same pack in two or three frame sizes precisely because torso length and hip circumference don't scale together in a predictable way.
If you're buying online without the chance to try a loaded pack first, prioritize retailers with generous return policies, and plan a short shakedown hike with a fully loaded pack before committing to a longer trip — fit issues that feel minor in your living room often become serious problems after several hours on trail.
Common Pocket and Organization Features
Hip belt pockets, sized for a phone, snack, or small camera, are one of the highest-value organizational features on any pack because they put frequently needed items within reach without ever taking the pack off. If you find yourself constantly stopping to dig through a top lid for small items, a pack with accessible hip belt pockets will noticeably improve your hiking rhythm.
Side compression straps serve a dual purpose: cinching down a partially full pack to reduce its profile and prevent gear from shifting, and providing external attachment points for items like trekking poles, an ice axe, or a foam pad that doesn't fit inside the main compartment. A pack with too few compression points will feel loose and unstable even when properly loaded internally.
A roll-top or extension collar — extra fabric above the main compartment that can be rolled down for a smaller load or extended upward for a larger one — adds real flexibility for hikers who use the same pack for both short trips and longer ones, letting a single 40-50L pack effectively serve as a smaller-feeling pack on lighter trips.
Breaking In a New Pack
A brand-new pack rarely feels exactly the same on trail as it did during a brief in-store fitting, since padding compresses and webbing stretches slightly with real use. Plan a short, low-stakes hike with a moderately loaded pack as a shakedown before committing it to a longer trip, giving yourself the chance to fine-tune strap lengths and pocket organization while problems are still easy to fix.
Pay particular attention during a shakedown hike to any seams or strap edges that create friction against bare skin, since this kind of chafing often doesn't show up in the first twenty minutes but becomes a real problem by mile eight. A thin layer of moisture-wicking clothing under shoulder straps, or a small adjustment to strap positioning, usually resolves it before it becomes a blister or rash on a longer trip.
Most reputable backpack manufacturers offer a reasonable return or exchange window specifically because fit issues are common and expected even among careful buyers — don't hesitate to use it if a pack that seemed right in the store turns out to create persistent discomfort on an actual trail test.
Maintenance That Extends a Pack's Life
Zippers are usually the first component to fail on a heavily used pack, and most failures trace back to grit and sand working into the teeth rather than a manufacturing defect. Rinsing zippers with clean water after dusty or sandy trips and applying a small amount of zipper lubricant once or twice a season meaningfully extends their working life.
Hipbelt and shoulder strap padding compresses permanently over years of heavy use, gradually reducing the comfort that made the pack feel great when new. There's no real fix for this beyond replacement, but storing a pack uncompressed between long trips, rather than crushed at the bottom of a closet under other gear, slows the rate of permanent compression.
Spot-cleaning a pack with mild soap and a soft brush, rather than machine washing, preserves both the fabric's water-resistant coating and any foam padding's structure far better than a washing machine cycle, which can break down both relatively quickly with repeated use.
Sizing Down: Why Smaller Packs Encourage Better Habits
A pack with more available volume than a trip genuinely requires almost always ends up full anyway, simply because empty space invites filling it with marginal or unnecessary items. Hikers who deliberately size down to the smallest pack that comfortably fits their actual gear list often report packing more thoughtfully overall, since every addition has to displace something else rather than just disappearing into unused space.
This effect compounds over a hiking career — a hiker who starts with a 65L pack for weekend trips tends to keep filling it to capacity for years, while a hiker who commits to a 45L pack for the same trips is forced to continually evaluate what's truly necessary, often arriving at a lighter, more efficient gear list simply through the constraint of available space rather than active weight-counting effort.
Final Checklist Before You Buy
Before finalizing a backpack purchase, confirm the torso size matches your own measurement rather than relying on overall height, load the pack with realistic trip weight to test fit rather than judging it empty, and verify the volume genuinely matches your typical trip length rather than buying extra capacity you'll rarely use.
Check that the hipbelt and shoulder straps both have enough remaining adjustment range in either direction for your body, since a pack that's only just barely adjustable to fit now leaves no margin for layering bulkier clothing underneath in colder conditions later.
Daypack vs. Overnight Pack vs. Thru-Hike Pack
| Pack Type | Typical Volume | Typical Weight | Key Features |
|---|---|---|---|
| Daypack | 15-25L | 0.5-1.5 lbs | Hydration sleeve, minimal frame, light padding |
| Overnight Pack | 30-50L | 2-4 lbs | Internal frame, padded hipbelt, sleeping bag compartment |
| Thru-Hike Pack | 50-70L | 3-5 lbs | Load lifters, large hipbelt pockets, external lash points |
Pro Tip
Adjust the hip belt before the shoulder straps; the hips should carry the majority of the load.
For more background, see REI: How to Choose a Backpack and OutdoorGearLab Backpack Reviews and Leave No Trace Principles.